https://showmeyourproof.blogspot.com/2018/07/what-theyre-not-telling-you-about-3d.html
Basically, clay is an alumina silicate and the formula is Al2O3 2SiO2 2H2O, but it is never found in pure form. There are several different clay minerals; for example: Kaolinite - a clay mineral with the chemical composition Al2Si2O5(OH) basically this is our secret to manual 3D printing
The basic recipe for papercrete is approximately 3 parts paper pulp, 2 parts portland cement and 1 part perlite and other optional fillers. Getting the paperpulp made to the right consistency is key. Too wet and the mixture is slumpy and if too dry – crumbly. Make small batches to experiment and get your mixture to your liking.As promised, I am writing today about small batch recipes for papercrete..
There is not one recipe that will work every time for everyone. This is because the paper used in the recipe differs from one source to another – even from one brand of newspaper to another. Check this for yourself. Next time you are in a party or variety store with several newspapers available for sale along with some free ones, feel the various papers and note the difference in thickness and texture. My suggestion is that if you are planning on making papercrete on a regular basis, pay attention to the paper you are using and strive to use the same paper in the same amounts each time to get consistent results. If you are planning on just one or two projects, worry not. I have used just whatever paper was at hand with many different results all of which came out just fine in the end.
Basic Recipe
This is a basic recipe that will make enough papercrete for two planters approximately 6-8″ deep, 12″ in diameter and 1/2 to 3/4″ thick. Start with approximately one gallon of water in a 3 to 5 gallon bucket.Tear an average size daily newspaper (USA Today or The Toronto Sun or Star) into 2″ strips. Push as much paper into the water as you can while still leaving an inch to 2 inches of water above the paper. Leave the paper to soak for at least 24 hours. Longer is better. Mixing is easier when the paper is soaked longer. 48 hours is good.

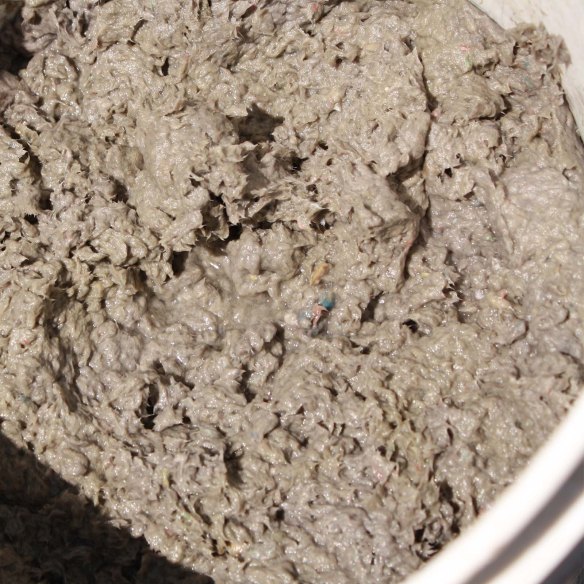
Next, using a paint mixer attachment on an electric drill ( not a cordless one), mix the paper and water into a pulp. The mixer should move fairly easily around in the mixture. If you are putting a lot of effort into this or your drill sounds like it is laboring, add up to a quart or liter of water and try again. At some point you will probably need to get your hands in the bucket to pull up paper from the sides and bottom that is not getting mixed in properly. The key to making good papercrete is getting the paper pulp to the right consistency.
When the mix looks like lumpy oatmeal and you can still see just a bit of water pooling in the top when you stop mixing you can stop and test your mixture. Take a small handful of pulp and gently squeeze it into a ball in the palms of your hands. Water should easily and freely be dripping from your hands as you do this. When you open your hand the ball should keep its shape and not show signs of crumbling or separating into sections. If the ball will not hold it shape and is flattening out on its own the mixture is too wet. Compact the paper in the bucket and pour off some of the excess water. If the ball appears to be cracking apart…add water and mix again. Keep track of how much water you are adding or subtracting to adjust the starting amount for next time around. Now form the ball into a patty just like a hamburger patty for the BBQ. Patt it a bit to smooth the top and edges. It should all hold together with very little separation on the edge of the patty. Very much like a home made hamburger patty that has BBQ sauce or egg in it.

Eventually, when you have worked out the paper to water part of the recipe according to the paper you are using. you will be able to go forward mixing the papercrete right in the same bucket. The first time or two I recommend measuring the paperpulp into a second bucket with a scoop of some sort. I use a 1 liter (1quart) bagged milk holder. Put three scoops of paper pulp ( push the pulp into the scoop a bit to release any air pockets), two scoops of portland cement and one scoop of vermiculite ( adds a little sparkle )or pearlite into the second bucket. This is the basic 3-2-1 recipe starter recipe. Mix. Again, if you are really laboring over this add water ( keeping track of course to obtain that one shot recipe you are looking for that works with your paper choice) Test the mixture. This time the mixture should form a ball with only a very little bit of water dripping from it. It should behave as with the first tests – hold its shape and make a nice smooth patty with very little separation at the edges. Add water if it’s ‘cracking..add a little portland cement if it is having trouble keeping a ball shape. Now try the mixture in your form.
The form needs a release agent to make removing the dried container easy. Any kind of cooking oil works great which is easily applied with a 2″ brush. Form an even layer of papercrete in the bottom of your form about 1/2 -3/4″ think and start building up on the side of the form. Just do a small area and then wait a minute or two to observe. If the sides sink or slump your mixture is still just a little too wet.
 Additional Notes
1. Choose forms with generously sloping sides when possible. Very steep slopes on the sides of your forms will make it more difficult to apply the papercrete without some slumping occurring and making it more difficult to release the dried container. Trying to dry the mixture up with too much portland cement to address this could make the papercrete crack and separate while drying. For very large forms or forms with straight or steep sides a reinforcing screen or mesh may be needed.(Still experimenting)
2. A small brick pointer tool or painters trowel tool can be used along the top edge of the form to smooth the area. Be sure to check that your sides are a consistent thickness for a professional looking result. A little sanding afterwards will tidy things up even more. A small drum sander attachment on your drill works nicely to smooth the top edge and the top inside walls. Lower walls and the bottom will be covered with soil so it’s fine as it is.
3. If you want drainage holes in your container you can poke a finger through the bottom layer while wet or drill one after it has dried. I prefer drilling afterwards as it just looks tidier.
4. When you have finished forming your container cover it with plastic for the first 24 hours to make the papercrete dry evenly ( not quickly on the outside surfaces and slowly in the middle). You can remove the container from the form after 24 hours. It will continue to dry for a few days. After it has dried completely try pushing your fingernail into an inconspicuous spot. Also try tapping on the outside or top edges. Your fingernail should not easily make a mark and when you tap it should make a sharp sound and feel very solid. The tapping sound will sound dull if the papercrete was too wet.
5. Papercrete can be colored with cement dye during mixing or stained afterward with stain or diluted acrylic paint. For indoor use, papercrete is porous so a sealant on the inside is probably a good idea to keep moisture absorbed by the container from damaging furniture surfaces.
5. Papercrete can be colored with cement dye during mixing or stained afterward with stain or diluted acrylic paint. For indoor use, papercrete is porous so a sealant on the inside is probably a good idea to keep moisture absorbed by the container from damaging furniture surfaces.
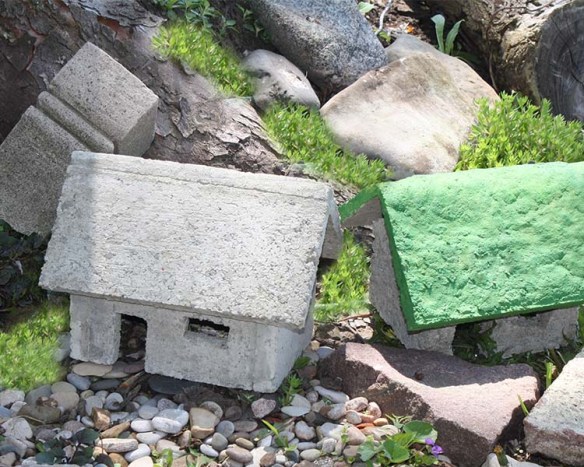
I’ve done many experiments with papercrete now and have made pots and houses with papercrete that I now know was too dry or too wet. All of them came out well enough to be used even if some took longer to dry. I haven’t had any of these finished projects long enough to tell you the long term result, but I suspect that if I have trouble with any of them it will be with the ones made with too dry a mixture. It seems that not all of the paper gets a coating of wet portland in this scenario and therefore has weak spots where the paper is lacking this. With one of my houses an area where there was just an inch width of papercrete ( from a too dry mixture) above a window broke while being removed from the mold. It easily glued back together. (Out door non shrinking waterproof adhesive sealant or liquid nails) Otherwise I haven’t had any problems as of yet. I wish you all the best of papercreteing fun and hope you will share your experiments with me and each other here or on my Fairy Garden Facebook Page
Marthe
Pozzolans such as fly ash and silica fume, are the most commonly used mineral admixtures in high-strength concrete. ... The superplasticizer gives the concrete adequate workability at low water-cement ratios, leading to concrete with greater strength.Marthe


No comments:
Post a Comment